Showing posts with label Refitting. Show all posts

Tuesday, November 27, 2012

A new boat!

Like a hermit crab for a while now I have been feeling like I have outgrown my shell, she feels too small and not exciting enough... Well I have just bought a new boat, or at least I will have in a few days when the bank processes my money transfer!

In my last post I had a list of a bunch of desired features of a new boat, most of which did not make for a cheap boat. Looking back over the list I think I have ticked most of the boxes, or at least the boat has the potential to tick them one day.

Thinking some more about it I guess one of the main goals is to be able to lift my sailing average on coastal passages from about 50-60% up to 70-80% so good light airs and windward performance are important. Also more space for a fully separate toilet and shower and at least 2 separate cabins and room for a kayak and a decent hard dinghy on deck was needed.

Those fellow boat nerds out there will immediately recognize the dreaded lines of an old IOR Two Tonner. yep.. Hrmm OK so they roll like pigs down wind don't they? err yep.. and.. they Broach at the blink of a hat right? (slightly red faced).. Yes so I am told.

Well that's the negative, the positives are the fantastic heavy air windward performance,  the huge amount of room, the strength of all alloy construction and good light air performance. Did I mention that I could also afford her, a big factor for someone with a simple lifestyle and aversion to debt like me, and I can afford to do what is needed to make her a simple fast cruising boat.

She wants a proper interior with insulation (one day), new rigging (urgent), a bigger engine (eventually), a redesign of the cockpit area plus dodger, and the sailing gear sorted for shorthanded work.

Strong 6,5 and 4mm Aluminium, exceptionally
well built by Noel Wilde in Melbourne.
A basic but functional interior. Those chainplate stays look annoying and she will drip condensation everywhere in tassie... 


One day maybe a lift keel could be retrofitted, so I will build the interior to suit a centerboard case in the distant future.

The bad downwind habits may be able to be improved by dropping the spinnaker before the wind gets over 15 knots and reverting to my slow trundling downwind with a poled out headsail. A wind-vane and auxiliary rudder will also help. A friend of mine has a boat with a couple of dagger-boards down aft for running. Apparently they also help considerably...

Anyway no rush, I will sail her for a few years before I do anything to drastic, She is quite serviceable as she is, It will take much time and money but I think she could be a great fast and fun cruiser to sail offshore and inshore.

Oh, by the way I now have an exceptionally tough, go anywhere red yacht for sale at a giveaway price to the right adventurous soul...

Edit, Snow Petrel has just sold, the new owner is Dean, he will cruise around Hobart way, learning the boat before heading off further afield. Sad in some ways, but it opens up a new door, and now I can afford to do some of the improvements to Sunburst.

Cheers

Ben

Monday, April 11, 2011

A tale of woe... Oh and RAIN

Well It's raining outside, and I have antifouling to put on Snow Petrel... Forecast - rain on and off for the rest of the week. I should have put the paint on yesterday morning before the rain started, but I hadn't primed any of the bare metal patches (only some small pinholes 1-2mm diameter) so I did that instead.

So now if I can get the bottom dry enough for one coat of antifouling I will be right. If not well, I'd rather not think about that, be positive, you know.

On the plus side I have taken off the tiller and planed it back and reshaped it. It has always been a bit of a hefty lump of wood. Rather ugly but strong. I have never gotten around to doing anything about it because I want a telescopic fancy aluminium tiller so I have always seen this as a temporary tiller. Anyway I decided I needed to have at least one nice looking thing to cheer me up and I have planed it down to a nice shape and started varnishing it. As soon as I started planing it I realised they did a nice job of laminating the tiller with alternating light and dark strips... WOW it's going to look great. I have put alot more taper into it and it will fit the hand better then the original old lump of wood.
It's amazing what hides under the old grey wood...


I have spent alot of time investigating stray currents because they may be the cause of some of the failure of the base layers of paint. I think that it is mostly due to the old age of the bottom paint and million layers of old antifouling but I want to eliminate any stray currents before I strip all the paint of and start again. It would be heart breaking go to all the trouble of doing this and then find the new paint coming off as well... So if anyone has any tips on a good stray current meter or using a multimeter to find leaks let me know. Some interesting sites on stray currents; this one seems very good, Yacht survey - and I would like to find out more about these meters and if they are any good or just a dressed up multimeter (I have heard one fellow around here swear by them). What other options are out there for testing? I guess my anodes have started working for the first time in 7 years or so so that makes me slightly suspicious. But they still aren't working hard.

I also would like to hear from anyone with information about sandblasting vs. mechanically cleaning with a sander. Or other options such as ultra-high pressure water blasting, soda or dry ice blasting. More research for me before the next slip in six-eight months time...

Anyway the sun is peaking out... time to head down to the boat

Cheers

Ben

BTW what does the rest of the world call coming out of the water, we call it slipping the boat.

Tuesday, March 22, 2011

Fatigue... of the metal variety

This was the chainplate from an old aluminium open 60 I skippered. This happened before I joined on the voyage back from South Georgia to the Falklands. The boat got badly knocked down and the cap shroud hole in the chainplate pulled out, resulting in the mast getting a rather nasty bend just above the 1st spreader (it was amazing that they didn't loose it!). It took the resourceful Falkland islanders 10 days or so to pull the mast out, straighten it, sleeve the distorted area and re-install it (an amazing job...) While they were at it they welded in a set of massive new chainplates. All done with very basic facilitys. As you can imagine we had our hands full cleaning up the boat and fixing the million and one other broken things from the knockdown.

Also broken was the staysail stay chainplate, you can clearly see another crack underneath the point of failure. This thing was just waiting for an excuse to let go, and it failed before the knockdown... 


A full inspection revealed a crack starting in the stainless steel solent stay fitting (right side, at the top of the weld), This is a common place for failure, right near the heat affected zone, just outside a weld. Once the crack starts it concentrates loads at this point creating a stress riser and accelerating failure, also nasty things like crevice corrosion can start inside the crack, eating further into the metal....

The forestay chainplate wasn't too crash hot either... lets not push her too hard...

The point of all this is not to bag out the boat, just to say that on older boats don't assume that just because things have not broken, doesn't mean to say they won't. Metal fatigue and corrosion can invisibly weaken parts that otherwise look solid. The Open 60 had a complete new rig 7 years before this, but the chainplates were over 20 years old, and possibly slightly underspecified to start with. She had had a hard life, alot of it in Antarctica, (cold may accelerate fatigue - any engineers out there?). Nobody had thought the solid looking welded in chainplates could give any problems....

The most highly loaded parts of any boat are normally the rigging and what they are attached to (and maybe the keel bolts...). Sailors are well aware of the need to replace stainless steel shrouds every 7-10 years or so, but many fail to realise that the rest of the load path is also highly stressed and subject to fatigue. Quite commonly people replace the wire religiously (to keep insurance company's happy..) but never change the highly loaded through mast tang bolts, or the tangs themselves... The tang bolts particularly seem to fail quite often, then dropping both port and starboard shrouds, meaning you can't even tack to stabilise the mast.... Turnbuckles also need replacing every so often, as can the chainplates.

To be really safe I think it makes sense to consider replacing all the components every 2nd rigging change (20 years or so) and very carefully inspect all components at every rigging change. Chainplates should either be massively oversize, or easily replaceable. Be very wary of any stainless that passes through a damp deck, stainless can corrode very quickly in a damp low oxygen environment.

I replaced some U Bolt chainplates as a precaution before a delivery, and was horrified to find two of the ones I removed had lost 90% of the metal due to corrosion, they had looked perfect.... Lucky I had been told to watch out for this by a friend who had one fail on his boat. Stainless is treacherous stuff....

My chainplates are mild steel (with SS edging and inserts) to reduce the problems with fatigue. Mild steel has some pretty forgiving properties, one being that if you keep the stress below a certain point (the endurance limit) it doesn't really fatigue, unlike most other materials which will always get slowly weaker with each load cycle (that year of mechanical engineering was useful after all!). My bottlescrews are also galvanised steel, as is my rigging wire - both come with industrial test certificates and a SWL (unavailable for yachting stuff...). When I next re-rig my boat I will replace my stainless tangs with galvanised mild steel mast fittings as well.

There are some non destructive ways to test for cracks, but they are not 100% and could give you a false sense of security. I normally use a magnifying glass and look carefully, but I really should invest in some dye penetrant and developer, this supposedly highlights any cracks, has anyone used it?

Anyway I guess I have just given you yet another thing to worry about... Thats good if it means you might be less likely to loose your mast. If anyone has had a rigging failure I would be very interested to hear all about it....

Cheers

Ben

Sunday, March 20, 2011

Welding stuff for your boat

Chainplates with SS inserts and edging
The of the best boat refitting skills I have is welding, It took me an adult education course and two years at night school classes to get really confident, (I have dreams of building my own metal boat one day..) So far all the pieces I have welded onto Snow Petrel have stayed put... (touch wood - metal?). And some of them are important like the tabernacle, and chainplates. My metalwork is not like the classy shiny stuff that you see coming from a fancy workshop with their TIG welders and polishers, it is more industrial, without the mirror polish and delicate weld beads but still does it's job just fine.

In fact I ended up replacing all Snow Petrel's deck fittings with (much better) welded on homemade stainless steel fittings. Now the only holes in the boat are the windows, hatches and winch bolts. I now have no deck leaks! (an incredible luxury), less rust traps and better designed gear.

My complete kit fits into a small suitcase, (except for the helmet), and can easily live onboard. At the moment I am welding up a little wood heater to replace my smelly diesel heater. I get alot of satisfaction from welding and I really think that If you plan to go to high latitudes a metal boat is a pretty good idea, and if you have a steel boat learning some basic welding skills makes sense. Welding aluminium as a different ball game, much harder, and expensive bigger welders are needed.
My incomplete fireplace door, Special fire glass is needed
It always surprises me that most budget sailors are happy to do their own woodwork, canvas work and rigging but bulk at even the most basic metalwork... If an uncoordinated numpty like me can do it, then most of the budget sailor population should be capable of learning and with some pretty basic skills, and a small amount of equipment some useful gear can be knocked up quickly and permanently from stainless steel. Even If you aren't happy welding you can always save alot of money by cutting out the parts and getting them welded up professionally (or by that mate for a 6 pack or two of beers....). If you take a few pieces of metal into any shop and ask them hust to weld them together it is normally pretty cheap, and they can often do it while you wait. Much of the cost is in designing, cutting and polishing the job.

Some basic tools needed -

A small DC inverter stick welder,  much better than the my old AC welder because it is way smaller lighter and has a much better duty cycle (It can run at 100 amps for 25% of the time, enough for most welding on a yacht), and it will happily run off any crappy power source, even what you might get at the end of an old wharf, or up a mast (I have chucked it over my shoulder and welded at the masthead). Get one that can run off a generator. Or alternately an onboard alternator welder can be used if desperate.

A welding helmet with an auto darkening lens is much easier to use.. also good quality respirator that fits under the helmet is essential to keep the worst of the nasty welding fumes away from your delicate lungs.

Welding Rods: I use 316L for welding SS to SS, 309L for welding SS to mild steel, and 6013 or 6012 rods for mild steel. Keep them very dry, humidity can effect the flux coating. 

A 5 inch angle grinder, I went though a few cheapies until I bought an expensive one. Make sure its a 5 inch with the big stud, taking discs with a 22.2 mm centre hole, not the toy 4 inch ones. I normally don't bother with a 9 inch grinder (even though I have one..) the 5 inch can do almost everything much better and is safer.

A heap of skinny 1mm cutting disks for the 5 inch grinder. (sorry about the mixed units, blame the french or the yanks... ) These things are magic, They cut through SS like its butter and leave a nice clean cut. I also assume they cut though fingers and other body parts just as well so be very careful to secure the work well (Like in a vice), always use the guards, and wear leather gloves and really good quality eye and ear protection... If you can't work out what the fuss about safety gear is, please never go to sea and preferably don't go very far from a well equipped hospital...
The most Important gear.. + Add Earmuffs and suitable clothes.
You will also want a flap disk or two for smoothing off edges, and those ugly lumps of weld, Its really just sandpaper for stainless steel, but it's the easiest way to clean it all up. SS grinding disks are also available, and remove metal faster, but flap disks still needed to finish the job. you can use a polishing wheel if you want, but I normaly use fine flap disks.

Add chipping hammers, wire brushes (SS wire brush For SS only), centre punch, cutting fluid for drilling holes and you are set. Drilling SS is a prick, sharp drill bits, lots of cutting fluid and a slow drill speed with lots of pressure are needed. Ideally a drill press for big holes... It is usually cheaper to take it in to a workshop and get them to drill any large holes rather than trash all your drill bits. A workshop can also cut out stainless steel quickly and easily into complex shapes with a plasma cutter - this can be very useful.

You can use pickling paste to clean up the welds an make them look shiny but it is seriously nasty stuff so I normally don't bother. They can just go very slightly rusty, no big drama if the peice is properly oversized (see here for more info on surface cleaning)

I used to get most of my material from scrap metal yards, but these days it is harder to find it this way, so I am forced to buy it. 304 is fine but get 316 if you can afford it. I have some dodgy stainless on my bow roller. It has a rusted to nice patina that I quite like, and the rust doesn't seem to be to getting any worse. Old rod rigging is awesome as SS edging for any non load bearing application. I collect old stainless steel fittings for parts that can be cut up or modified to make new fittings. 

I am always careful not to rely on stainless unless it is massively overbuilt, It is tricky stuff and can fatigue or fail without much warning. Also when welding and grinding beware of heat build up and sparks. Be very careful about fire risks, I have seen a quite a few burnt out steel hulls, and nearly had a nasty fire inside Snow Petrel, Some ports require a hotwork permit. And it is not allowed on most of the better class marinas or slipways... find somewhere abit more industrial. Oh and also grind well away from anything shiny, white or expensive. grinding dust blows along way and then rusts....

Thursday, March 17, 2011

Icing and escape hatches

                     Winch starting to ice up, I leave the winch handles in to stop socket icing up - Ideally a hard cover would be good, to enable instant use. Also in extreme conditions tiller may ice up as happened to Totorore.

The other day I was thinking about Berserk, and it got me thinking about hatches and icing and getting stuck inside a boat.... What got me thinking was that Jarle has finally spoken out
and it makes interesting reading...

So what I was thinking (all this thinking was starting to hurt..) was that in a severe icing condition at sea it seems quite possible that the hatches could get badly iced up. I have always been abit claustrophobic, and the thought of being trapped below decks with a stuck hatch is terrifying.. So I guess it would be smart to have some means of forcing them open and also another escape option, hopefully not also iced up badly and frozen shut...

Sprirt of Sydneys main hatch. Note my boots
 Spirit of Sydney had a main companionway door that opened inwards (into the cabin). This is very unusual in my experience. I have never seen one that opens inwards before on any vessel, and it can be abit of a menace. It is heavy and if it gets loose could do damage to fingers and such. From an engineering perspective it is kind of backwards as well, with the major loads from a wave going entirely onto the closing dogs and hinges and trying to open the door, forcing it off the rubber seal rather than pushing it tighter onto the rubber seal with the loads evenly spread into the rim. But the door is strong enough, it has been well proven over many years and in the worst conditions at sea on this vessel.

Thinking about this strange door in relation to severe icing conditions - It would be much easier to open even if heavy snow and ice had filled the cockpit and blocked the doors. It would also be easy to open with a cockpit full of water, or after any event that meant the cockpit was obstructed (ie a dismasting with a broken piece of boom in the cockpit) - Infact I find it hard to imagine a scenario that would trap a person below with this door. I suppose the whole door frame being distorted might jamb it, but this would jamb any door.

Actually for any offshore sailing getting stuck below decks, or maybe even worse stuck on deck would be pretty dangerous. Rolf and Deborah From Northern Light told me about a main hatch securing rope getting caught in it's V cleat inside the boat locking the hatch shut. They were both on deck and quite a few days away from land - stuck outside with no food, water, shelter or tools (all below decks). Eventually (after long enough for the seriousness of the situation to sink in) the boat rolled heavily and the line freed itself.....Whew!!

Snow Petrel has a backup escape/entry hatches - My lazarette hatch only opens and closes from outside and my main-saloon skylight is always free to be opened from inside even when the dingy is ondeck and covering the forward hatch. But both could still be blocked by severe icing.... Maybe I should add an inwards opening hatch somewhere?
Ice melting fast, and wind dropping.

The only moderate icing I have had was whist at anchor and then the main hatch was protected by the dodger. We had to make sure our ventilators remained somewhat free of ice, but that was all, I think we probably had about a ton of ice onboard at it's peak.... Gerry Clark had some very bad icing on the little 32 foot "Totorore", while heading towards Boyvetoya, deep in the south Atlantic (55 south) in late September. It sounded horrible... It's well worth reading his book, probably the most epic small yacht voyage ever, and it was a voyage that did some very useful scientific work, by getting the first accurate data on seabird populations in the southern ocean and it's islands.

I am interested to know if anybody has experienced severe icing at sea on a yacht, what problems it caused, and how best to minimise it's dangers?

Cheers

Ben

Saturday, February 26, 2011

A High Latitude Dodger.

The dome needs abit of "De-icing"
I was Lucky when I bought Reiger, Jim Dilly had already put a canvas spray dodger on her. If he hadn't it probably would have taken me a few years to work out how great they are. I am sure I would have maintained that I liked the taste of salt water and by not having a spray dodger it improved my "feel" for the boat or some other utter rubbish along those lines, so Jim did me a big favor...

Reigers dodger had a fantastic canvas flap that zipped onto the back of the dodger and bungeed down to the cockpit completely enclosing the whole area under the dodger. With this fitted I could actually cook standing up in the companionway, inside my little canvas tent, warm and dry, even with driving rain from astern. The steam from cooking would rise and condense inside the dodger and not the cabin. Wet weather gear could be stashed either side of the hatch, out of the cabin, and in cold weather it kept alot of the heat in the boat, like an airlock, but still provided ventilation.  I could even sail with the flap on. and of course the dodger kept me warm and dry at sea, all up it was brilliant...

My only complaints were that I couldn't work out how to fit a perspex dome to the hatch, and when I was sailing across the Tasman on my own I needed to climb right out into the cockpit to have a good lookaround, This required wet weather gear and a harness, and waking up properly - and I usually got at least a face full of salt water..

When it came time to fit a proper dodger to Snow Petrel I thought long and hard whether to put a canvas dodger or a hard dodger on the boat. We had built a series of hard dodgers for a few boats up at Launceston. The designer/artist was my friend Greg, he has a great eye for a nice looking dodger and after 3 builds we had worked out a quick strong method of building a hard dodger, But I was worried about how one might survive a southern ocean breaker landing smack bang ontop of it, at least with a canvas dodger I could just straighten the frame and stitch it back together, If I had been stupid enough not to fold it down...

The answer to building a stronger dodger came when I sailed on 2041, one of Chay Blyth's challenge 67's. The dodger onboard 2041 was maybe abit "practical" looking but had very strong knees at the after end that also doubled as somewhere to lean against. After seeing this I decided to go with a hard dodger, and as a bonus I could just squeeze a dome under the dodger on the main hatch and another on top of the dodger, above the hatch, meaning I would be able to have a look around without leaving the security of the main hatch.

It looks like this.


1 - 18 inch 6mm perspex dome, absolutely amazing view, doesn't steam up and can be used from inside the hatch or inside the cockpit. It is high enough to have a good view forward. It is a feature that I wouldn't be without. For tropical sailing I might fit it onto a hatch so it can be removed.

Little green hatted man is warm, dry and very happy!
2 - Hand rails set inboard to serve as longitudinal stringers, and gives a comfortable seat on the edge of the dodger roof. By setting them inboard the are easy to hold onto when on the lee deck.

3 - The dodger top is 2 layers of 6mm plywood laminated into a curve. It also has glass sheathing and non skid paint. This is more than strong enough to jump on. I intend to put a mainsheet traveller on top of it at some point...

4 - At the aft edge of the top and the sides is an external laminated beam. Inside this is an aluminium boltrope extrusion to take the canvas flap, to close in the dodger. This Beam stiffens and strengthens the top. It also stops water blowing back from the dodger top into the cockpit. And It forms a good handhold, hence burying the aluminium track inside the wood to stop my fingers getting cold.

5 - Big plywood and glass knees strengthen the aft end of the dodger, they also have handholds and make a nice backrest, or place to lean against. They also give the canvas flap something to overlap to stop rain driving in. They are tied with several heavy layers of unidirectional glass onto the top of the dodger, and bolted to stainless tangs on the coamings.

6 - Cabin top is used as a step to get onto the dodger, it also makes the dodger look better to set it slightly inside the cabin edge, and it is easier to build.

7 - Windows are 4 mm perspex, designed to break before the dodger does...

8 - Dodger sides are 9mm ply, doubled in high load areas, with heavy biaxial fibreglass tape in all the corners. They are bolted through welded stainless steel tabs on the cabin top. a Sikaflex fillet seals it to the deck.
From Astern, a bit of food on the wharf to store somewhere...
I spent alot of time looking at the ergonomics, mocking stuff up and trying to balance looks with functionality. I am happy with the results. There is room to sit in the cockpit completely under the dodger totally out of rain, snow or spray, and I can steer from this position, peering out the dome for a good look around. I need to add a few small windows to the top of the dodger so I can see the jib luff from this position.

I shifted the main winches aft 6 inches or so so I had space to sit on the cockpit coaming alongside the dodger steering with the tiller extension. This is very comfortable and gives a great view.

The dodger got its test on the way down to Antarctica, It copped a big southern ocean breaker, landed right on top of it, knocked us down and got some water below. I was sure it must have broken a window in the dodger but they survived. At some point I can imagine a storm bad enough to destroy the dodger, but if I survive I will just build another one, If I built it strong enough to survive anything it would be far two heavy, instead it is designed so that it cannot damage the watertight integrity of the boat.

One big advantage of having a dodger is that you can dress lighter, meaning when deck work needs doing you don't overheat, sweat and then get very cold as can happen if you are dressed very warmly for a windy cockpit watch with no shelter.

I think the dome/dodger combination is a big safety factor in cold water, keeping crew dry and warm, but some experienced sailors like Rolf and Deborah off Northern light don't have one, using the dome on the main hatch and an effective windvane instead. And I must say that if I got a bigger boat I would probably have more of a pilothouse setup, but with a sheltered area off the back.

I have sailed on a few boats that have a dodger sheltering the crew at the front of the cockpit but not the helmsman at the back of the cockpit. In my opinion this is stupid, the helmsman should be able to get their body out of the worst of the wind and spray, and ideally duck and get their eyes away from a dollop of spray. I have had my eyes get so much salt water driven into them that I could hardly see, A sensible dodger would have solved that problem.

On Blizzard we really wished we had at least a half dodger over the exposed wheel to keep at least our hands dry (or a good autopilot...), but instead we had numb fingers and could only manage half hour tricks in bad weather. Spirit of Sydney had a big lexan dodger, covering most of the cockpit and giving the wheel some shelter, this worked well, and I could hand steer for hours in the worst weather. A big safety plus.
Now thats a dodger! All Polycarbonate on alloy frames, it goes right back to the helm, ideally the helm needs raising slightly for better visibility, but you can stand to the side and steer with you foot for excellant vis. Note the clutter on deck...
 My father got home from the trip on snowpetrel and quickly fitted a spray dodger and roller furling to their 45 foot gaff ketch, after the 30 years that we had to put up with being wet and cold, so at least he was convinced of the benefits. But he couldn't quite bring himself to add a dome. Saying it just wouldn't look right...

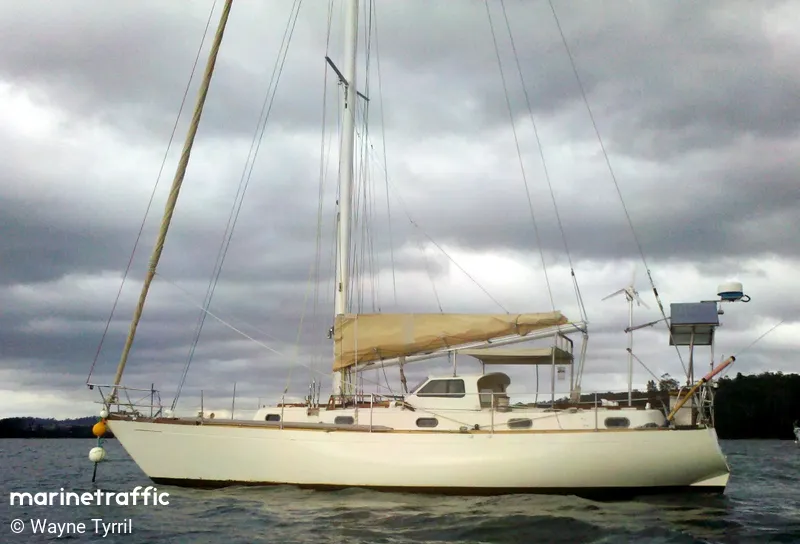
The original dodger that spawned provided the pattern for mine, Looks much sleeker on a 38 footer, Nice work Wayne, Greg and Grant. 
Gosh Dad a spray dodger sure would be nice.... Note the Reefed Staysail on a boom.

Note the slightly raked angle of the dodger, this helps remove the illusion of the dodger being droopy, very important as a level dodger top will often result in the side panels looking slightly droopy due to the camber and fact that the sides are narrower at the forward edge. 

Here you can see the lip at the aft end and the radius of the top. The inboard handrails are very good, providing a comfortable seat on the dodger. 
 Under construction, note the annex track buried all around the aft edge.


Another Sister dodger. 
Plenty of room under the dodger, just enough headroom, and your whole body is out of spray and rain.


The dome was fantastic, here I am still inside the hatch with the door closed, perfect 360 view and safely wedged in place. 
The only shot with the canvas closure flap at over the back of the dodger, Two bungees held it down so it was easy to lift and get out.It really kept in the heat, and kept out snow ,rain and spray.

Sunday, February 20, 2011

Snow Petrel... The boring details

A few keen observant and possibly quite bored people have noticed the extra page added to the blog.. well done! It's next to the videos page on the top of my latest rambling blog if you aren't one of those observant ones..  I kind of slipped it up there to see what would happen. I wrote this a few years ago to go in the back of a book my old man was writing, Its incomplete, caustic and a few things have changed since then, but if you have nothing more important to do, and are curious it is up there... I plan to slowly add stuff to it, but may well not get around to doing so, maybe this blog is my attempt to add to it... Any comments on the page can be posted here.

Cheers

Ben

Thursday, February 10, 2011

Storm Tactics Part 1 Preparation

After last nights boring battery discourse I thought I'd better give you something abit more salty, Although truth be told electrics will probably give you more grief than storms...

Careless is the ass, who sleeps with a low and falling glass.

I'm sure what you want to hear is lots of salty sea dog tales of waves washing the ship, while lightning flashes around our stout ship and the low clouds race overhead.. But I can't be bothered tonight (maybe I'll do some as case studies latter). What I can do is give you a glimpse into my thoughts on dealing with very bad weather.

I have been through some nasty weather in many different yachts and ships, There are plenty of people with more experience than me, and plenty with less, and lots of perfectly valid ideas and concepts. My best advice is to read widely, including opposite opinions to what you might think, Ie the Pardeys have a very different ideas to what a round the world ocean racer might prefer. Both are valid for different vessels and sailing styles and also listen to that quiet old sailor in the corner of the bar, his words might make all the difference in some blow somewhere.

My thoughts are that it really comes down to luck, good preparation, a strong boat and a good mental attitude, ultimately it has less to do with the specific tactics involved. I think to many people get tied up in the one magic solution, Hanging all your hopes on one favored tactic is rather dangerous, The sea is too dynamic, each storm will have very different wave characteristics, and each boat can behave unpredictably in extreme winds. what worked well in one case might not work at all in others.

Ok I will give you a salty story to illustrate this point. My friend Dave Pryce is one of the most experienced sailors I know. He took his 20 meter alloy yacht Blizzard down to Commonwealth bay and got caught in a very serious blow. In the past he has always run off at speed, steering down the waves, but this time the wind was to strong, the boat kept surfing down the waves, broaching uncontrollably, He described it as as if he had a spinnaker up in 40 knots. And he was under bare poles. He ended up lying a hull, apparently the wind lay her over so far she just slid down the waves with no rolling, like being hove too. Now this is interesting because if Dave said the storm was something else, it was, and the vibrations from the harmonics in the rig undid one bottle-screw, and the prop shaft bolts (he lost his shaft..). Dave agrees that lying ahull is not normally a good tactic, but he had no other options, and it worked for him. I wouldn't recommend this, beam on is usually the worst way to lie, but it shows that you need an open mind.

I start my storm tactics at the dock before I leave. Mentally I expect to be rolled, that way I am not surprised if it actually happens. And at least some of the lockers will stay closed (because I will have made sure they all have some sort of hold down). I make sure I have the basic gear and an idea how to make some sort of jury rig, because in a rollover the odds are not good that the rig will stay in the boat. I make sure I have confidence in the boat actually staying together. Any specific niggles are dealt with as far as possible, either physically or mentally (I tell myself that cars are much more dangerous..). 

There are always some things that will worry you, That is normal see The wimp, fear at sea . I suppose that's where experience comes in, and the luck. Fix what you can and try not to worry to much about what you can't fix. Remember, the fundamental prioritys, don't do any other nonessential work until these priority's are sorted out.

1 Keep the boat afloat and in one piece (staying afloat also means keeping off the rocks)
2 Keep yourself attached to the boat and uninjured.
3 Keep the rudder attached.
4 Keep the rig up.

If you can maintain at least 1 & 2 from this list you will almost certainly survive any storm. if you are not sure of these maybe reconsider your plans? Not sure who to credit these rules to, I first saw something like this written by John from www.morganscloud.com  many years ago in a magazine and they certainly are spot on.

I know when the boat and crew are ready enough. The key word here is enough, It doesn't mean all the jobs are complete (they never are...), just that the boat is safe and the crew are ready. The crew are familiar with the boat, this is best gained by working on the boat.

On Number 2  Keeping uninjured, I like to have helmets for extreme weather, and some sort of restraining device for my bunk, so even inverted I will not fall out. Quarter berths are good for this, but stick your head up the cockpit end. Lee cloths need to be strong (the only nasty injury onboard was due to leecloth coming undone) , and I like to have another flap that holds me in and protects me from flying sextant boxes and the like.

Enough for today, I have run out of steam, and you are probably bored, I will continue this latter, if my fickle mind doesn't forget and give you more electrical drivel instead.. 

But if you have got this far I have a reward for you, a Video,  I hope it loads OK, I took it from Blizzard on the way to South America somewhere halfway across the southern ocean.  See if you can work out how we were lying and what the wind speed might have been... Its about 3 megs or so, and has a big wave hitting us.


By the way, I think I lost the game (see the video to understand this cryptic remark..)
Cheers

Ben